Second Chances Girl - a Miami family and lifestyle blog!: DIY
Showing posts with label DIY. Show all posts

Tuesday, January 31, 2017

Free Printable Unicorn Valentine Cards

Do you have a little one that loves unicorns? Well, then I have a special treat for you: FREE printable unicorn valentine cards! Amberly is obsessed with unicorns and already has her eye on these cards for her friends! Hey, it doesn't get any better than free and unicorns!


Printing these cards couldn't be any easier. All you do is right click the image below (8" x 10") and print on cardstock! Then you just cut them out! Told ya it was easy!


I think we are going to attach the cards to a little baggie of cookies or meringues and then hand them out to Amberly's friends. 


Monday, May 16, 2016

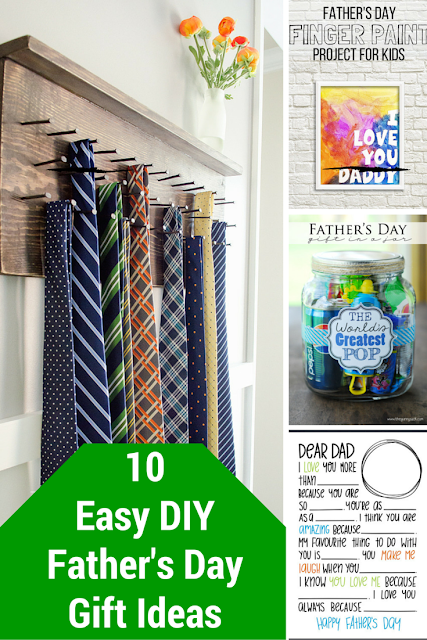
10 Easy DIY Father's Day Gift Ideas

Father's Day is about a month away and it's time to get crafting!!! The dads in our family love handmade gifts from the kids, along with a nice lunch on Father's Day. They would never expect any of us to spend a lot of money on their gifts (even though we sometimes do) and they love to see that the children put time and effort into their gifts. Need ideas for easy DIY gifts for Father's Day? Well you've come to the right place! I have compiled a list of my 10 favorite easy Father's Day crafts for my kids to choose from and I am sharing it with you!

10 easy DIY Father's Day gift ideas!!!

Some dads receive a tie every year for Father's Day. Some dads even have a pretty cool collection of ties they would never really buy for themselves but this year, instead of tie, how about a DIY tie rack? I thought this was such a cool idea from Craftaholics Anonymous!


Next is a craft that even a baby could do. My kids have always loved finger painting and getting messy and here they get to make a gift out of it! Check it out here!


I love creating gift baskets for gift giving but always get stumped on a Father's Day one. Well, thanks to The Gunny Sack, I know have a great idea for a Father's Day gift in a jar!! JC would really love a World's Greatest Pop jar full of yummy pop and a retro push pop!


I love interview printables. We fill one out every year for JC. I love to see how different the kids answer the questions every year. This year, we are using these printables from Be a Fun Mum!


More gift basket amazingness......this time from Moms and Munchkins.  My dad works construction so this would be a super cool "toolbox" full of goodies for him!


Sometimes we just need a simple gift for those special dads in our lives. This "World's Greatest Pop" popcorn gifts are so great for all our movie-loving dads! I would pair this with a new fun DVD. Check it out here!


What dad doesn't love sweets? I know some special dads that would devour these incredible cupcakes. Check out some more amazing cupcakes here!


Dads are the anchors of our families and this "Dad, You're My Anchor" printable is perfect to just pop into a frame or use to create an adorable Father's Day card! Check out the printable here!


How fun is this Father's Day cake full of goodies for Dad? I love everything about this cake from the soda to the measuring tape to the candy. This cake is completely customizable to your dad and his favorite goodies! Check out this cake idea here!


Coupon books are always fun and get used more often than you'd think. Sometimes they get used in one day! LOL! I can just imagine JC pulling out the homemade cookies coupon, breakfast in bed and help out with yardwork simultaneously! Print out your coupon book here!


Hope these ideas help you make some incredible gifts for that special dad in your life. Dads are the best and deserve to have a great day!!

Thursday, March 31, 2016

Thank You For Your "CommitMINT" Gum Stick Tree

Disclosure: This shop has been compensated by Collective Bias, Inc., and its advertiser. All opinions are mine alone. #GIVEEXTRAGETEXTRA #Walmart #CollectiveBias


All of my three kids are in school all day and I volunteer my time at the school as often as possible. If there is one thing that I have noticed is that teachers are really unappreciated. These men and women have dedicated their lives to teaching our children and with all the budget cuts and political issues, teachers are not acknowledged as I believe they should be. My mom friends and I often get together to do nice things for the teachers at the school throughout the year, not only during teacher appreciation week. This week I will be putting a little "treat" tree in the teachers lounge. I call it a Thank You For Your "COMMITMINT" tree!


To me, gum is such a treat and once I saw these new Extra® 35-stick packs by the checkout lane at Walmart, I knew they would be perfect treat for a group such as teachers. 35 sticks means more gum for all!!


I purchased both the Extra® Gum Spearmint and the Extra® Gum Polar Ice® varieties. I love carrying gum in my purse to share with others and I knew that I would need more than just one pack for a craft.  I knew I wanted to make something different than what I had seen before and something that was easy to make. After some thought, I decided on a tree type craft where a teacher could just pass by, pull a stick of gum and go on their way!

For the tree, you will need the following materials:

(1) 9" foam cone
(1) roll washi tape
(1) sheet of 12 x 12 scrapbook paper
(1) popsicle stick or wooden dowel
scissors
regular tape


First, you wrap the foam cone with the scrapbook paper creating a bigger cone shape. Tape the paper to the foam cone.


Then, trim off the excess paper. 


My foam cone broke (thanks kids!) but your paper cone should look like this. This paper cone will go over the foam cone as a sleeve.


The next part is easy. Attach a piece of washi tape to the end of a stick of gum.


Attach the sticks of gum to the tree, side by side.


Repeat this same step until the whole tree is covered with sticks of gum. Washi tape makes it easy to pull off a stick of gum later.


Here is the printable for the top of the tree. A little "thank you" always goes a long way, especially for overworked teachers! 


Attach the printable to the popsicle stick. I used the same washi tape.  Then just push the popsicle stick through the top of the foam cone. 


VOILA! Easy and cute gum stick tree that I know the teachers will love! I can't wait to drop it off at the teacher's lounge this week!


The Extra® 35-stick packs are easy to find in the checkout line at Walmart. The new packs feature durable, recycled packaging and feature more gum!!


Have you picked up a new 35-stick Extra® gum pack yet?
What kind of "treats" do you make to show your appreciation to your child's teacher?

Wednesday, December 2, 2015

DIY Christmas Tree Photo Garland

Disclosure: This shop has been compensated by Collective Bias, Inc., and its advertiser. All opinions are mine alone. #SaveYourMemories #CollectiveBias

Have you put up your Christmas tree yet? We did, well we bought it over the weekend and added lights and some ornaments. JC and I agreed that we would have a more "personalized" tree this year so he is cutting out some wooden ornaments and I decided that I would make a garland. I wanted a big, statement garland for the tree and I wanted to make it myself. Holidays always get me into the crafting spirit! After some thought, I came up with a photo garland to display my favorite pictures from this year! 

Do you include personalized items on your Chritsmas tree? How about an easy DIY Christmas Tree Photo Garland to share your favorite memories from the past year?  #SaveYourMemories #ad

I am not super crafty but I get by. The first thing I knew I would need would be sparkly paper and a printer to print out my pictures. While I was Walmart the other day, I passed by the entertainment section and checked out the printers. I found this wireless HP DeskJet 3632 All-in-One Printer/Scanner/Copier that would be perfect for us and it was under $60. Score!!


I got home and quickly set it up. By quick, I mean less than 15 minutes quick. Once set up, all I had to do was download the HP app on my phone (for wireless printing) and I was ready to go. I have so many pictures on my phone that I want to display around my home but am too forgetful to send to print. This printer makes it so easy. I just choose the photos from my gallery and hit print.


The pictures print within a few minutes. As you can tell, this printer is compact. Here it is, on top of my couch, completely wireless. So fantastic!!


Back to my DIY photo garland: Gather your photos (I printed mine out on 4 x 6 in paper) and sparkly paper. You will also need scissors, glue and ribbon!

DIY Christmas Tree Photo Garland #SaveYourMemories #ad

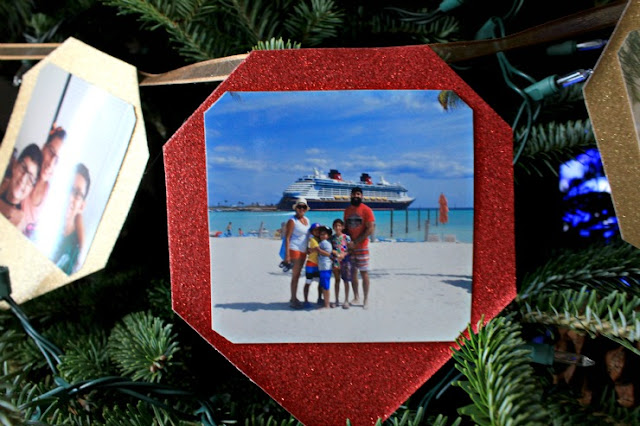
Cut your sparkly paper into desired shape. I cut mine to look like ornaments. Then I trimmed the photos to fit.

DIY Christmas Tree Photo Garland #SaveYourMemories #ad

Then I just glued the photos to the papers and glued the papers to a ribbon. VOILA!  a DIY Photo garland that's a big statement piece for your tree and shows off your favorite memories from the past year!

DIY Christmas Tree Photo Garland #SaveYourMemories #ad

This is a super easy and quick DIY. The only issue you might have is choosing your favorite photos!

DIY Christmas Tree Photo Garland #SaveYourMemories #ad

I made sure to include 2 photos of the kids, a photo of me and JC and of course, a full family photo from our most favorite vacation to date!

DIY Christmas Tree Photo Garland #SaveYourMemories #ad

HP printers are available at Walmart stores nationwide. Check them out the next time you shop at Walmart. 


Do you have a wireless printer at home? Aren't they fantastic! Also, I'm extra nosy today so tell me, how do you personalize your Christmas tree? garland? ornaments? Please share, I need more ideas!!

P.S. Looking for cute holiday printables? Check these out, they are FREE!!

Wednesday, September 30, 2015

DIY Halloween Treat Bags

Disclosure: This shop has been compensated by Collective Bias, Inc., and its advertiser. All opinions are mine alone. #TrickOrSweet #CollectiveBias

"Trick or treat! Smell my feet! Give me something good to eat!" I can't wait for it to be Halloween and I get to hand out treats to all the ghouls, goblins and little monsters that will be knocking on my door. I live in a large apartment complex where there are lots of kids and teenagers and Halloween is always a fun night. Last year, I saw how crafty my neighbors were with their treats, so this year I am stepping up my treat bag game. This year I am creating cute Halloween treat bags stuffed full of delicious candy for all my neighbors!!

Scare up some silly fun this Halloween with these easy to make treat bags! #TrickOrSweet #ad

First things first, I need candy and LOTS of it. Regular sized bags wouldn't cut it this year so I went to Walmart and purchased the BIG bags of Hershey's candy. Have you seen these bags yet? They come with fun Halloween designs on them and they contain between 145-210 pieces of candy. I started with two bags but I have a feeling I might need some more!

Scare up some silly fun this Halloween with these easy to make treat bags! #TrickOrSweet #ad

There are only a few specifics to these bags. They really are a design as you go type deal. You can go as elaborate or as simple as you want. Basic materials required are:

For one bag

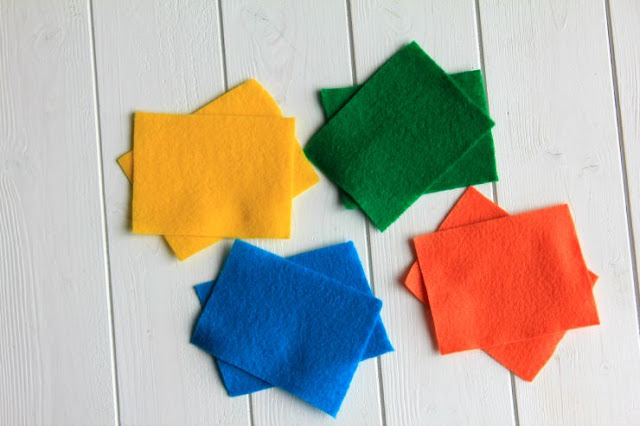
Felt (any color you want)
Ruler
Hot glue gun
scissors
googly eyes, pipe cleaner (anything you want to add)

Scare up some silly fun this Halloween with these easy to make treat bags! #TrickOrSweet #ad

My bags weren't too big. They measure 3"W x 4" L and 1" W by 4"L for the handles 

Scare up some silly fun this Halloween with these easy to make treat bags! #TrickOrSweet #ad

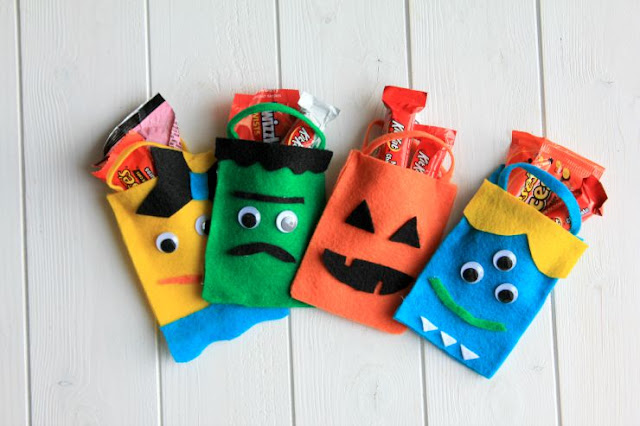
I started out making 4 treat bags. These were my test subjects. I wanted to keep them funny and not scary. I don't do scary Halloween! I figured funny face monsters would be loved by all!

Scare up some silly fun this Halloween with these easy to make treat bags! #TrickOrSweet #ad

Once I cut 2-3" x 4" pieces of felt, I used hot glue to glue three sides together.


Then I added the handles. I just used a dab of hot glue at each end and attached to the open corners of the bags.


Not hard at all.............


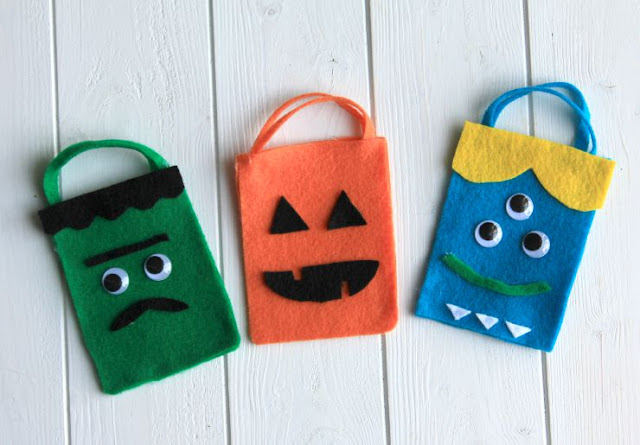
Then comes the fun, deciding what your funny face monster will look like. I wanted a Frankenstein looking monster so I cut hair, a unibrow and a mustache out of black felt. Then I hot glued these pieces onto the front of my bag, along with two googly eyes!


Come on, who doesn't love a mustached monster???


Then I just followed the above steps for the other 3 bags. It's Halloween so of course I needed a Jack O'Lantern bag!

Scare up some silly fun this Halloween with these easy to make treat bags! #TrickOrSweet #ad

A three-eyed monster is always a must!

Scare up some silly fun this Halloween with these easy to make treat bags! #TrickOrSweet #ad

Oh and let's not forget a girly monster with a skirt and big hairbow! 

Scare up some silly fun this Halloween with these easy to make treat bags! #TrickOrSweet #ad

Once I finished my four bags (honestly, they took 15 minutes total), I stuffed them full of yummy Hershey's candy. These kids are in luck, they are getting Twizzlers, Kit Kats, Reese's, Jolly Rancher. Halloween doesn't get any sweeter than this!

Scare up some silly fun this Halloween with these easy to make treat bags! #TrickOrSweet #ad

These Halloween treat bags are so simple to make and would also be a fun family activity. My kids will be making some this weekend. I can't wait until Halloween to see the kids faces when they receive their Funny face monster treat bags!!

Scare up some silly fun this Halloween with these easy to make treat bags! #TrickOrSweet #ad

Remember, the BIG bags of Hershey's Candy are available at your local Walmart. I found mine right at the entrance!


Tell me: How do you plan on changing up your Halloween treat-giving this year? 


Linkwithin

You might also like: